Tuesday, March 27, 2012

Lighting

One cannot stress enough how important light is. From the ability to make a torch in a survival situation, to how annoying it is when that weird sized bulb in the fridge goes out requiring a special trip to Home Depot. Since the discovery of fire, man has been scared of the dark. That may be hyperbole, but it's not far off. We light our homes, streets and parks. When those lights go out the average person can only rely on the light from their cell phone. It amazes me how completely unprepared most are for a simple power outage, much less a long term loss of power. 

My survival mantra is that I plan on my first three solutions to any problem failing, always have multiple backups. I have made entries in previous posts touching on the importance of a good flashlight. I normally carry three when its convenient enough, and worst case scenario, I have everything needed to make a torch and light it, as long as I can find a stick that is. At home I have even more redundancies, too many to list but they include many flashlights, weapon lights and improvised lighting made from automotive D/C systems. To outline a few can give you an idea of what you really need  to survive the night long term. 

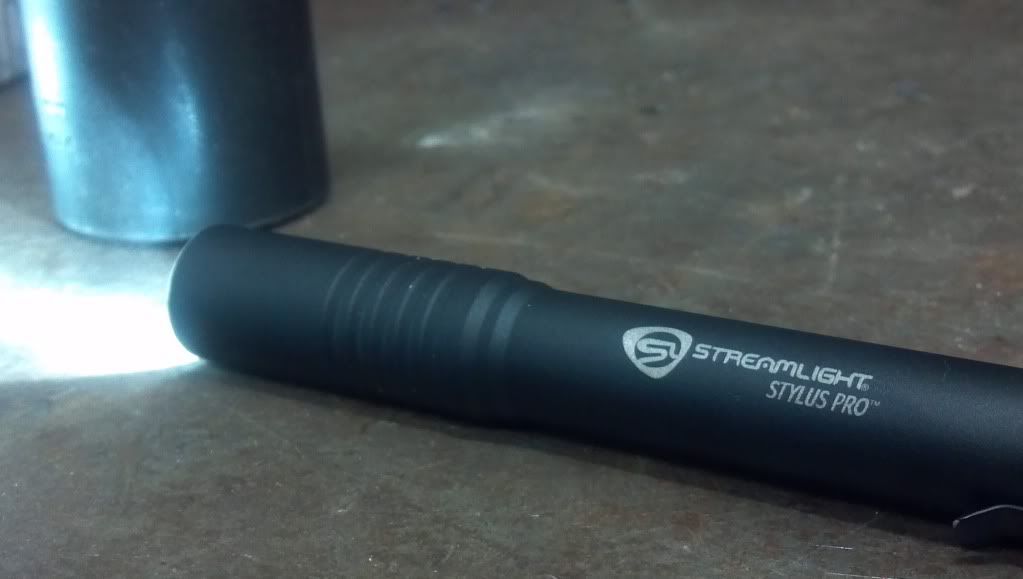
The lights I carry with me everyday are two Streamlight Stylus Pro LED penlights, and a Mini Maglite LED.  I won't get too in depth as I have mentioned them in previous posts. Suffice to say they are very cheap, effective, and efficient. The Maglite also has a SOS/Flash setting that can come in handy for signaling. Unfortunately they both use standard AAA and AA batteries, this is not very sustainable. If the world really did end, they would be useless within a couple years. Even with rechargeable batteries, only a few years of use could be expected. For daily preparedness and survival on the other hand, they could be a life saver. 

 
At home in my affectionately named "Tactical Closet", I store my favorite light, a Streamlight Stinger LED rechargeable. These lights are literally bulletproof, aircraft Aluminum body, 180 lumen max output, three brightness settings and a strobe feature. The main reason I highly recommend this series of lights is that it can be charged via the wall outlet or in the car. I currently have a jump box (charged through a solar panel) charging my light. With a two hour continuous run time per charge I only need to plug it in one night a month or so with normal use. I also have the less expensive Xenon model that uses the same charger as well. Also a very solid light, but not as bright and lower run time. They also share batteries so I have one spare that I keep topped off.

Have you ever tried to make a torch? It's a good skill to have, and it's quite fun. A torch is made with a stick, an absorbent cloth, and any oily fuel source. Anything flammable will work, but oily fuels will last much longer. Simply wrap a cloth around a stick and tie it tightly, soak it in the fuel, and light. Do some experimentation to find the best fuels, I've found the best improvised fuel to be gun oil, but regular lamp oil works great if you have it. You can also make a torch from birch bark. Split a stick about about six inches and tie it off to keep it from splitting further. Fold pieces of birch bark and wedge them into the split. Light the torch, as it burns, slowly feed the folded bark up to provide oxygen to the bark. A properly made birch torch can burn for over 10 minutes. Not really a long time, but better than nothing. Make about thirty of them and you can at least make fire wood runs at night, or fend off an attack. 
 
Improvisation is important, not only does it save you money but it prepares you for a time when you can't just pick something up at the store. So I'm constantly keeping myself busy with little projects. Being a mechanic has given me many opportunities to pull apart  various vehicle lighting systems. My new favorite for improvised lighting are those little LED halo lights around headlights. If you pull apart the headlight, they can usually be separated into a string of 12v LEDs. These make super efficient lighting that can be run off of a car battery, and charged via solar or wind power. At a 50,000 hour life, LEDs like these are the key to long term lighting. If you can get your hands on sulfuric acid and lead, you can make your own batteries. Collect enough of these LEDS, and you can light your home for a lifetime.


Knot Tying: Seamanship: Knots, Bends, and Hitches pt1-2 1973 Dept of Def...

Saturday, March 24, 2012

Sterno Stove


A few moths ago I had a post about finding resources where others wouldn't think to look. My example was projector headlights for fire starting. The parabolic lens used to focus the headlight beam is also great at focusing the sun to start a fire. One other resource within that headlight is the trim ring that holds the lens in the housing. When totally broken down, this little piece of metal is the perfect size for a sterno stove. It's lightweight and durable. It almost seems like it was made for this purpose, the sizing and height are perfect. Simply place atop the sterno can, light, and cook away. Once you run out of fuel, make sure to save the can. Denatured alcohol, gasoline, or even something you distill yourself can be viable replacement fuels. 


Wednesday, March 7, 2012

Chia pets are edible!

Did you know that Chia seeds are edible? Very similar to Quinoa, they are rich in nutrients and high in protein. Chia seeds can be purchased in health food stores or in Chia pet form at random places all over. So when looting for food, don't forget to pop into the "As Seen on TV" store and grab a few of these. At least eating a Chia pet is a better alternative to eating your cat.

What will you do when your matches get wet?

So fire, duh. Very important, and I don't know about you but I haven't gotten friction fires down. So until that day I rely on modern tools. So of course I carry lighters and matches and the like, along with a firesteel. A very neat tool I'm sure you've seen Bear Grylles use, and his knife is where I got the idea for modifying my knife.

This flint is kept on my keys at all time, it can get wet and still produce a spark that's over 2000 degrees. Unfortunately the striker that it came with was junk, too small, and digs into your hand every time you used it. So I generally use my knife as a striker. The Bear Grylles knife has a surface on the back specifically for this purpose. So instead of buying a new knife, I just modified the one I have. Three seconds with a grinder and I have a perfect striker surface.

Saturday, March 3, 2012

Solar Cooking


In a survival situation or apocalyptic scenario, it doesn't make any sense to waste energy gathering wood when its warm out. So how can you cook your food without this enormous energy waste? Make yourself a solar cooker.

Solar cookers are generally made with a reflective material that reflects sunlight onto a dark colored cooking vessel. They can range from simple to incredibly complex. In this I'll lay out three very simple types, two of which are really easy to build at home.


The first is by far the easiest and most common type. It basically consists of a cardboard box lined with tin foil or mylar. Take a square cardboard box, and cut one along a corner from top to bottom. Line the entire inside of the box with tin foil. I use spray adhesive, but any glue you have will work. Angle the flaps at the top and front slightly inward, but not so much as to block light. Trim out the spaces on the bottom so that the lower flaps can be angled slightly upward. Make another flat piece to put the opened box on top of. Put a black crockpot in the center and face it south. Depending on cloud cover and temperature you can fully cook a chicken in about five hours. By periodically turning the box towards the sun throughout the day you can increase its efficiency.


The second type is a little more involved but very doable. First you need a satellite dish. Any size will work, the bigger it is, the faster it works. Just keep in mind that even a small dish can start a fire. For the reflective material you can use tin foil but Mylar is much better on curved surfaces. Cut your reflective material (in this case Mylar) into thin triangles. Spray the dish with adhesive and smoothly apply the Mylar, rubbing out air bubbles as you go. Spray the backs of the strips just before you apply them to ensure a smoother surface. Find the distance that the reflected sunlight is focused and place the pot at the focal point. This cooker boiled a pot of water in about a half hour.

If you want to tackle a large project, a water parabola is really neat. The basic design is a clear plastic sheet suspended above the cooking area, filled with water creating a parabola. Start by finding the heaviest clear plastic available. Cut a round hole in a piece of plywood and attach the sheet to the top, giving it a bit of slack. Build a frame to suspend it about 6-10 feet in the air and fill it with water. The weight of the water pulls down on the plastic forming a parabolic lens. Now find the focal point and make a table that is the proper height. Obviously don't use anything flammable. If you build it big enough you can fry an egg in seconds.

Using these and similar methods you can cook your food, pasteurize water, and even start a fire.

Here's a cool video from Green power science