Monday, May 23, 2011

Concealed Carry

Concealed carry is a very touchy subject for many, and in a few states its flat out illegal. I'm really not looking to get into my opinions or spout statistics to anyone. Suffice to say, I carry a gun and I do so legally. Bad things happen to good people everyday, whether its violence or a natural disaster, you need to be prepared. If you decide you need to carry a gun, please follow the rules. A good reference I've found is carryconcealed.net. They have a ton of information and links for you to find all the info you need.

If you decide that carrying a gun is not right for you, or you live in area that it's not legal, (or so painstaking to get a license it's not worth it) there are other options. Some states allow concealed carry of tasers and less lethal options. My personal favorite is the Kimber pepper blaster. They retail around 40$ and can be purchased at most places that would sell firearms or pepper spray. Unlike typical pepper spray, these are effective out to about 12 feet. The active ingredient (capsaicin) is in a gel, instead of an aerosol, this limits blowback onto the user. Newer models have sights like a gun and are really easy to use. Check local laws regarding the carry of such items. The retailer you buy it from would be the best place for information in your area.

Before puchasing a handgun you need to decide what you're going to want to carry. I try to balance stopping power, price, and concealment. There are thousands of choices out there, it all depends on what your situation is. A good route to take is to have a couple options. Maybe have a larger pistol with a lot of power that you can carry when its convenient enough to conceal. For instance when you're wearing a heavy coat or sweatshirt. Then to also have something smaller and lighter for the summer months when you're wearing shorts and a t-shirt.


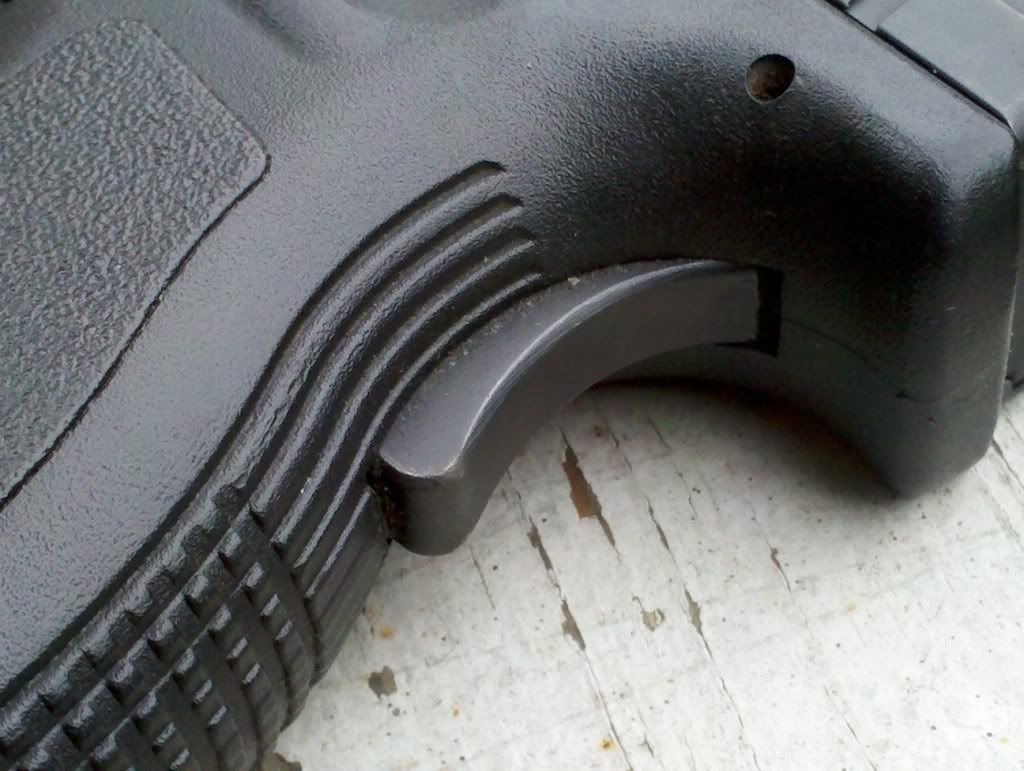
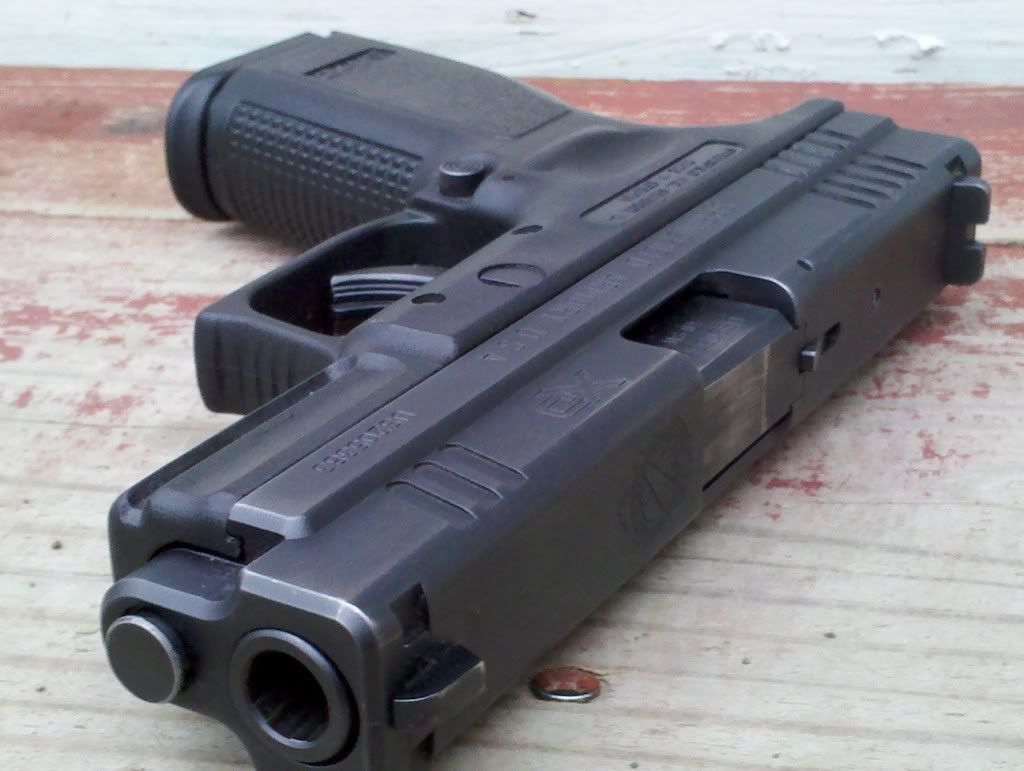
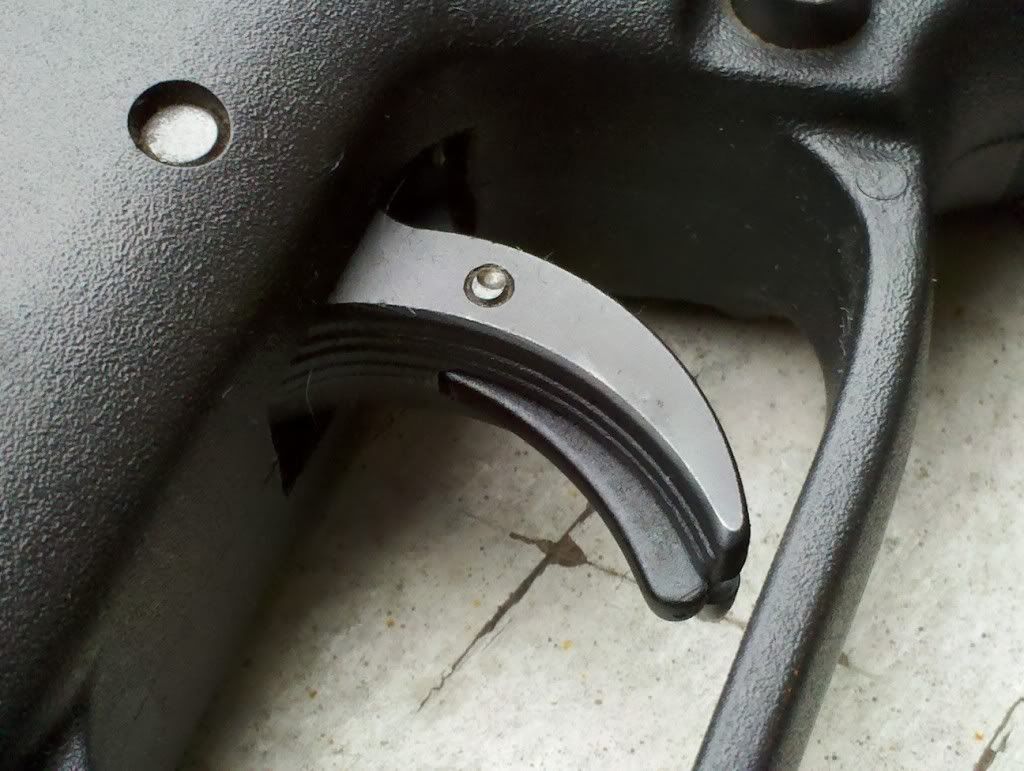
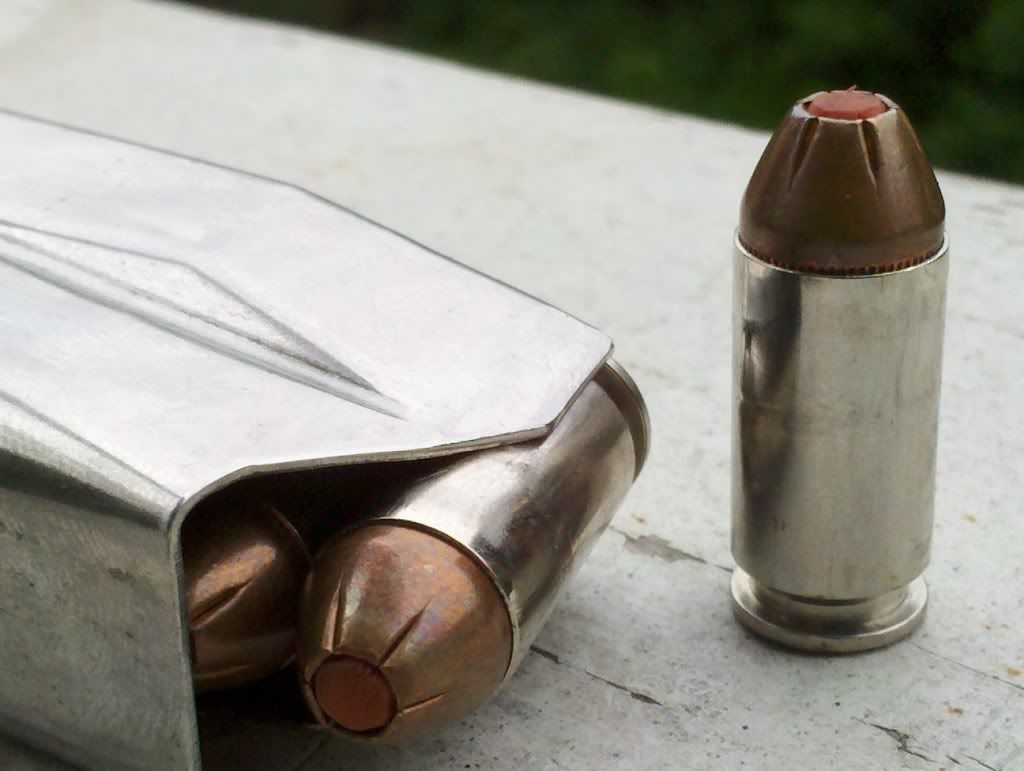
For my main carry pistol I went with a Springfield Armory XD in .40 caliber. This is a very rugged, polymer framed pistol. I chose it because of it's reliability, safety, and reputation. I've fired over 2000 rounds through it and only had a few malfunctions. (all ammo related) The main draw for me was the safety system, it's equipped with two safeties. The grip safety is on the rear of the gun. It makes it so the gun can't fire unless it is being gripped, if it was dropped for instance. The second safety is on the trigger. The trigger canot be pulled without a deliberate action. this protects from snagging the trigger and accidentally discharging it. Many other guns in the same class, Glock would be the most prominent, only have the trigger safety, or none at all. Some Glocks do have manual safeties. I garuantee the first time you go to fire it at the range and realize you left the safety on, you'll wish you had something more intuitive though. They're also equipped with loaded chamber and cocked indicators. If you live in a state that has no magazine restricions I recommened checking out the XDm as well, everything the XD has with higher magazine capacity.


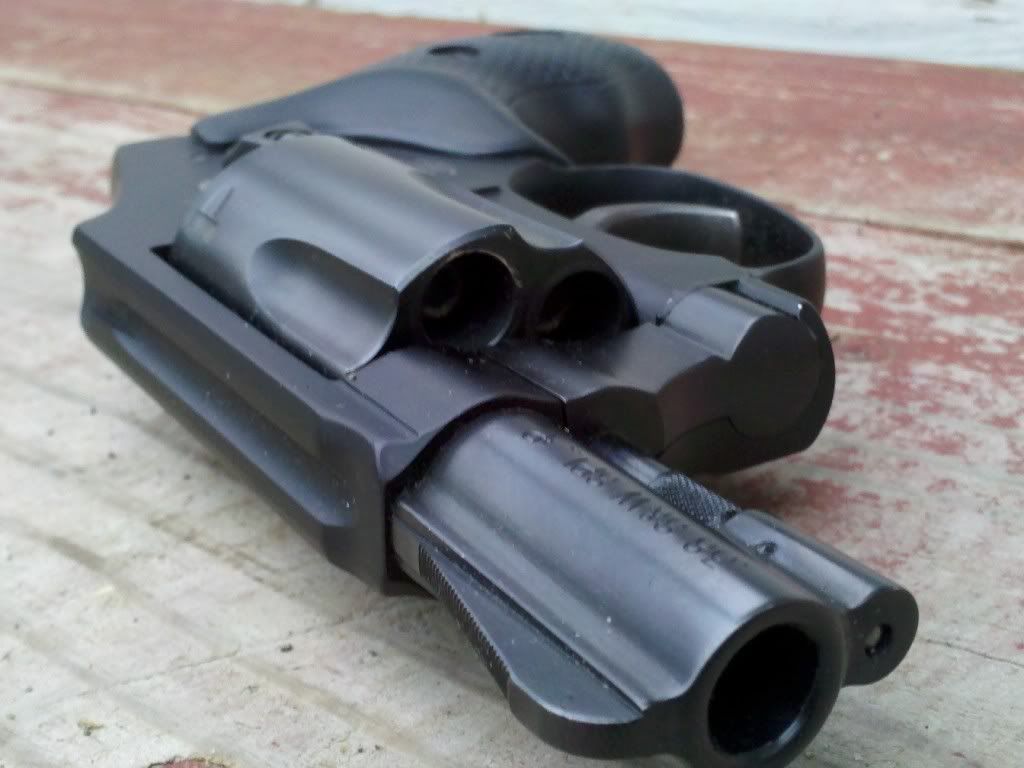
For my secondary, I carry a Smith and Wesson M442 airweight, in .38 special +P. Not quite as powerful as the .40 caliber, but being able to carry it in my pocket or on my ankle is really nice. The reason I was drawn to this model is the reduced weight, and hammerless design. You can definetly get a gun from Taurus or a half dozen other manufacturers that would be comparable in quality. They would most likely be much cheaper as well, but they'll never be as light. Before this one I had an older model 36, a nearly identical gun on the surface, but a whole lot heavier. My new one loaded is lighter than the old one unloaded. But if you're looking to save some cash and can deal with the additional weight I would check out Taurus. The hammerless design is offered by most revolver manufacturers. The lack of hammer makes it much less likely to snag on clothing while being drawn. You do lose a little accuracy by not being able to fire it single action. I think its a sacrifice worth making, especially if you're going to be carrying it in your pocket. It's also equipped with an integral locking sytem. When locked, the trigger cannot be pulled.

Possibly the most important part of carrying concealed is choosing a holster. Last thing you wanna do is shoot youself in the leg because you were too cheap to buy a holster. I have quite a few for all my guns. Not because I planned it that way, but because I was cheap. Do not buy universal holsters. They are not very good, ever. Spend the money and buy a Kydex or leather holster made for your gun. I'm not a big fan of Kydex (plastic) holsters, simply a matter of comfort for me. I think in open carry they are well suited, but not my cup of tea I guess. My brand of choice is Desantis. I have two leather ones for the XD, one in the waistband and one on the belt. Both are very comfortable, but the in waistband one does show a little when you bend over or sit down. The belt holster is great for open carry or concealed, provided my shirt is loose fitting enough. For the .38 I use an ankle holster, (also from Desantis) or carry it in my pocket.

Ammunition is very important too. Everyone has their own preference on brand, caliber and the like. The whole point is that if you're pulling a gun, it should be in the defense of your life or someone elses. You do not draw your weapon unless deadly force is your only option. I am fortunate that in the couple years I've been carrying I have never had to draw my gun. I hope I never do. But if I did, the last thing I should be firing is target rounds. Most cheap target rounds are full metal jacket. These don't stop when they hit someone, they keep going long after they exit the bad guy. Last thing you want to do is hit an innocent bystander. Do yourself a favor and carry high quality personal defense rounds. Theres way to many out there for me to review them all but I'm pretty brand loyal to Hornady. Generally I carry their TAP Critical Defense. They're frangible hollowpoints with a polymer tip. Because of the hollowpoint design they stop within a few inches of impact, limiting the chance of it going through. This also expends all of the bullets energy, causing more damage.

Nothing I can tell you here can make you more safe than proper training and practice. If you don't feel comfortable, take a class. Read up on proper technique, and get out to the range as often as you can. You could have the nicest and most powerful gun on the market, but if you havent developed any skill with it, you're screwed. Muscle memory is very crucial when it comes to drawing and firing your weapon in a stressful situation. Practice until every move becomes second nature and you will give yourself the best chance in the worst possible situation.

Monday, May 16, 2011

Maple Identification

This past spring I was way to busy with quite a few projects and wasn't on the ball with a post about maple syrup. So unfortunately we're well past maple syrup production this year. The good news is everything is green again. This makes identifying trees much easier. This is the time of year to identify sugar maples and mark them for harvest next spring.

For those that don't know, maple syrup is simply the sap of a sugar maple (black maples and a couple other varieties work as well) boiled down about 40/1. Next year around February I'll put up a post with more detailed directions on the process. Then in early march some video of the process itself.

For now it's important to find our sugar or black maples while they're easier to identify. To the untrained eye, most maples look the same, but only about half the varieties will yield a sugary enough sap to make syrup, and some can't be used at all. I live in New York, about 90 miles North of the city in Poughkeepsie. My area is fairly suburban although it is a city. Many of my streets are lined with maple trees. Too bad they're mostly Norway maples. These are a species imported in because they do well in an urban environment. They have a milky sap that is not good for syrup. The easiest way to identify them is by pulling a leaf off and squeezing the stem, you will see a milky substance. They have broader leaves (pictured left) than sugar maples and a smoother bark. (It is very difficult to tell the difference in the bark of young trees, black and sugar maple bark becomes scaly with age)

What I'm most likely to find in my area that I can use are black maples. Sugar maples are fairly common in New York, but are more prevalent north and east of me. The black maple has smaller leaves than its Norwegian cousin, and it's sap is clear. It should be noted that any maple with a clear sap can be tapped for syrup, but you may not yield as much for the work. I have heard that silver maples work fairly well, but have no experience with them. Look for scaly bark, (pictured right) and pull off a leaf. If the sap runs clear it's a good bet its what you're looking for. Selct trees at least 10 inches in diameter, with no evidence of dead limbs or rot. Make sure however you mark your tree, it's gonna last till spring. I used a wood screw and a bit of yellow plastic.

Monday, May 9, 2011

Water Purification and Procurement

This seems like it should be a no brainer to me, but I am constantly surprised at how little people think about something as important as water. Hopefully you have your disaster plan ready, with plenty of water stored up. Even if you do you need to plan to find it for yourself.


All questionable water needs to be filtered and sanitized, if you have any reason to think theres chemicals in the water, leave it be. No amount of improvised filtration is 100% effective. For heavy stuff like dirt you can make a filter out of cloth, or let it settle and skim off the top. For the stuff you cant see, like giardia and other pathogens, you need something a little more fine to filter through. Take a couple five gallon buckets, the stackable ones are best. Drill one hole near the bottom of one, and 20 or so in the bottom of the other. Take the bucket with the holes in the bottom and place a cloth at the bottom. Make layers of alternating gravel, sand and charcoal. Starting with the gravel on the bottom. place this bucket inside of the one that has the small hole drilled. this should give a couple inch gap at the bottom for the water to drip. Something similar to this can be improvised from almost any container.


Now to purify. Boiling is always best. It desroys all pathogens, and evaporates many chemicals. Bringing water to a rolling boil will nearly always make it safe to drink. Boiling can also be used to make salt water drinkable. By building a simple still you can catch the condensed water that boils off, while leaving the salt behind. This method is also effective if filtration isn't possible, as any dirt or debris would be left in the boil pot as well. The simplest of stills would be a plate or a piece of metal suspended over a pot of boiling water. Tip the plate down towards another container and the steam will condense and drip down. A simpler way of doing this is to throw your t-shirt over a pot of boiling water, let it absorb the steam and wring it out.

Pasteurization is a fairly reliable method as well, but I would only recommend it if you dont have anything to boil in. To pasteurize, heat the water to 160 degrees and maintain that temp for about a half hour. This should kill anything in there. You can do this in a plastic container by placing it near your fire and slowly bringing up the temperature.

You can also purify water with bleach, I wouldnt recommend doing this unless you had no other choice. Really it isn't much different than how your tap water is purified in many places. Take your water 1 gallon at a time and add 1 tablespoon of bleach at a time, mix and let sit for about 20 minutes. If the mixture begins to smell very slightly like bleach, you're done. Let it sit an additional hour, and drink. By this point the chlorine has killed off all the bacteria, and hopefully some of it has evaporated enough so that it tastes ok.


Solar stills are about the most effective, they require no energy to run, and once you're done building it, it doesn't require much work. Dig a hole a couple feet deep, and a few feet wide. (size depends on the containers you're using) Place a large, shallow container (or line the bottom with a black garbage bag) and fill it with your tainted water. Place a smaller container in the middle. (make sure it doesnt float) Cover the hole with a clear plastic bag. Line the edges with rocks to make it somewhat airtight, and place a small pebble in the center of the plastic above your cup. The sun heats the still like a greenhouse, the water evaporates and condenses on the cooler clear plastic. It then runs down the the low spot where you placed the pebble and drips into the cup. If you have a long piece of tubing you can place it in the cup and run it outside the still so you can drink without disturbing the plastic. This method is also effective for purifying urine if there is no water available.

Procurement can be a challenge in nature but there are tons of opportunities in an urban area. The easiest being your hot water heater. I touched on it in my last post. Simply shut off the water coming in, (there is most likely a valve at the top) and drain from the bottom. Simple as that, you dont even need to turn off the valve at the top onless you're worried about contaminated water in the taps. (for example in a widespread flood scenario or nuclear disaster)Another easy one is the toilet, by that I mean the tank at the top, not in the bowl. In a dire emergency you could use the water in the bowl, but it would need to be sanitized first.


Simple rain collection can be your best bet for long term survival. If you own a house, use your gutters, clean them well and the water should be good to drink as is. If you have a tarp available, use your imagination and build a collector.