Monday, August 13, 2012

Solar Battery Backup


This is a quick review of a solar powered backup battery I picked up. I wanted one of these so I could charge my iPod and phone while out on the trail. I got this one on Amazon for under 30 dollars. The reviews were mixed, but I figured for the price it was worth a shot. The specs are 3 hours to charge with the wall outlet, 5 hours via USB, and 6 hours will give a 50% charge in full sun. From what the manual says you can't get above a 50% charge with sunlight, but the solar aspect is more for topping off.

First impressions are as mixed as the reviews. The solar panel looks very well made, sturdy and scratch resistant. The rest on the other hand, not so much. It has the feel of one of those iPod knock offs you win at the boardwalk. But hey, it was only 30 bucks. It also has a state of charge indicator on the back and an led on a flexible stalk. I'm sure I will get of use out of the light.


For the first charge they recommend a full charge via wall outlet. So three hours later I gave it a try, it charges my iPod, success so far. Over the next few days I topped off my devices, and did two full charges on my phone. (had to recharge the backup twice) So far it delivers as advertised. I would probably get about ten full charges on my iPod Nano, and one and a half on my Droid with one full charge on the backup. This is going to be really great for battery sucking train rides to the city. I did attempt to charge an ipad, no luck there. It sucked the backup down to zero and barely reached 5% charged.


Today, with the backup totally dead, I left it in the sun from 9 am to around 2:30. As promised, it charged to 50%. Another hour later it was still there, so 50% does seem to be the max for solar charging. Not ideal, but it would certainly be enough to keep a phone running, and more than enough for an iPod. Overall I'm pretty happy with it. The downfall will certainly be durability. I really don't think this thing would survive even a mild drop. But for the price I can't complain. It will be perfect for commuting and for camping.

Saturday, July 7, 2012

Remora No Clip Holster

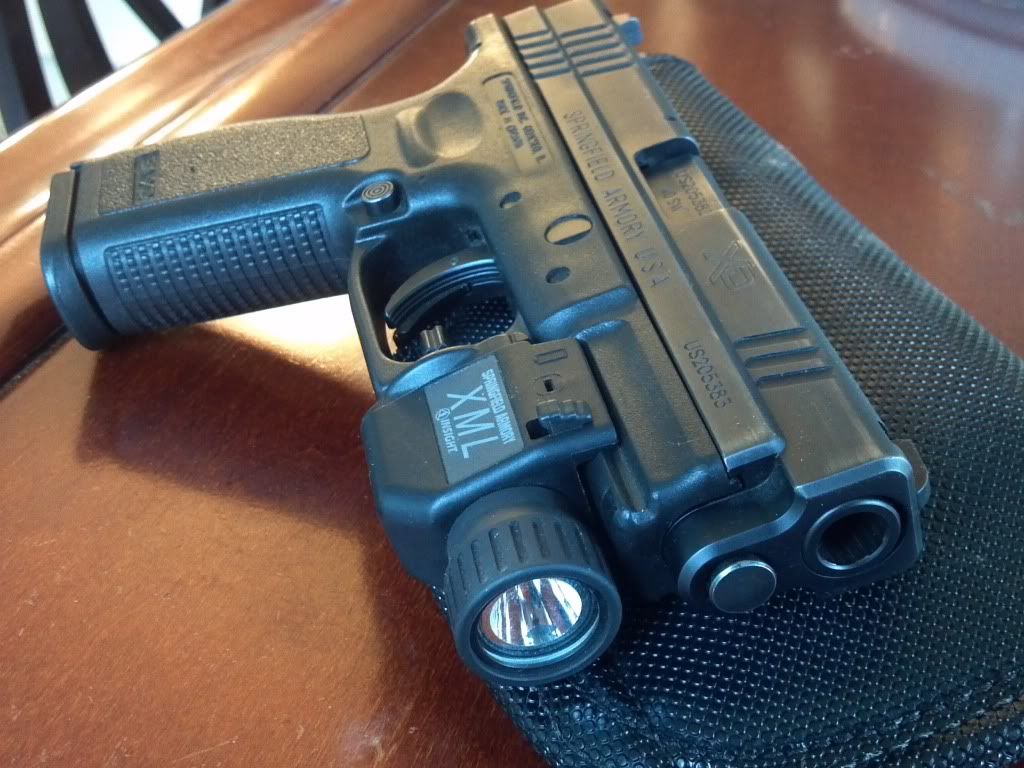
For those that carry, I'm sure you have had trouble finding that perfect holster. As far as I can tell, it doesn't exist. There are a few that come damn close, and Remora is one of those holsters. I have found over the last few years that you really do need a holster for every occasion, including the clothing being worn and the temperature outside. Are you headed somewhere that it won't be a big deal if you show a bit? Or will it be a major problem if your gun is showing? For me the big problem I always had was on the motorcycle. I was having so much trouble concealing my XD that I went out an bought a .38 for pocket carry.

At that time I was using an in IWB (in waistband) holster from Desantis. I dont want to knock that holster, it is incredibly comfortabe, and well made. The only problem is to carry on the hip you need to buy pants 1-2 sizes too big. To carry at the small of the back works well, but you cannot sit down as the gun sticks straight out. This holster was out of the question when riding the motorcycle as well for this reason. My second holster purchase for that gun was another Desantis, this one a leather outside the waistband. Another fine holster, but much harder to conceal. It can be hidden under a t-shirt, but there is a noticeable bulge. The average person wouldn't notice, but it is there. This holster is excellent for carry under a jacket or sweatshirt, but summer is here and that is not gonna work too well. The major downside I haven't mentioned yet is that I can't utilize any of my lights or lasers.

I have searched for years to find an IWB holster that will fit my gun with the light attached. There are many Kydex options for outside the waistband, but very few for IWB carry. I first heard of Remora from video reviews on Youtube, all of which were overwhelmingly positive. They have an interesting design, using a rubberized, grippy material for retention instead of clips. This allows you to place it in your waistband wherever you prefer and at any angle. It doesn't seem like it would be secure enough, but after the videos I saw I was sold. So I ordered one, amazingly it was only 35 dollars. Along with my order I inquired about 1911 holsters, as they didn't list a holster for the model I'm planning on buying.


I recieved an email from Alan (presumably the owner) within a day, thanking me for my order and my inquiry about the 1911 holster. He gave me the model number for the holster I would need, and told me to reference the email for a free mag holder for my trouble. I was amazed, it really was no trouble at all. So about 5 days later my XD holster arrived, with a personalized note from Alan. First impressions are very positive, high quality construction and nice look. I ordered the model to fit my XD 40 with a 4 inch barrel and light modification with the reinforced top. On my first try I actually had to put the holster in place before I buttoned up my jeans, it was that grippy. Once in place, it would not budge, draws nicely and had a good feel IWB. The only downside, my light didn't fit, The gun alone works just fine, but it was too tight with the light attached. I figured I must have ordered the wrong size, so I double check the part number. No luck, I ordered the right one and it doesn't fit. So I email them and used the holster without the light for the time being.

During daily carry it worked great, deep concealment even on the bike, and really secure. About two days later I recieve an email from Alan. He apologized for the problem and said it was most likely due to the reinforced top option. It stretches the material wider, making the clearance on the bottom smaller, only allowing the smallest of lights and lasers. He went on to apologize for the issue, and said he would send out a replacement that would work better. As far as the first one I got, he said to keep it in case I had a friend who could use it or I wanted to carry without my light. I was blown away by this, by far the best customer service I have recieved in a long time.

A few days later my replacement arrived, and it works great. The only downside is without the reinforced top, reholstering is a little tougher. A minor sacrifice to make for having my light at the ready. I suppose it's the draw that really counts anyway. I have carried with this holster for about a week straight and it has not so much as budged once. Draws cleanly and easily, and is very comfortable as I can put it wherever I want regardless of what I wear. The biggest surprise of all, was the 1911 holster included in the package. A free gift to make up for the inconvenience, what an amazing company. Now I really can't wait to get my 1911. Remora has certainly gained a customer for life.

http://remoraholsters.com/

Thursday, May 17, 2012

Wednesday, May 9, 2012

Retrieveable Ammunition

Guns are great survival tools, but they do have their drawbacks. They are loud, require cleaning, and use ammunition that cannot be retrieved after use. They are certainly a large part of my survival plan, but I'm planning for the long term. I would love to tell you that my attempts at building a bow went swimmingly, unfortunately this is not the case. If I were less proud I would post the video of my bow breaking on the first draw. Thankfully Cabela's still stands. 
 
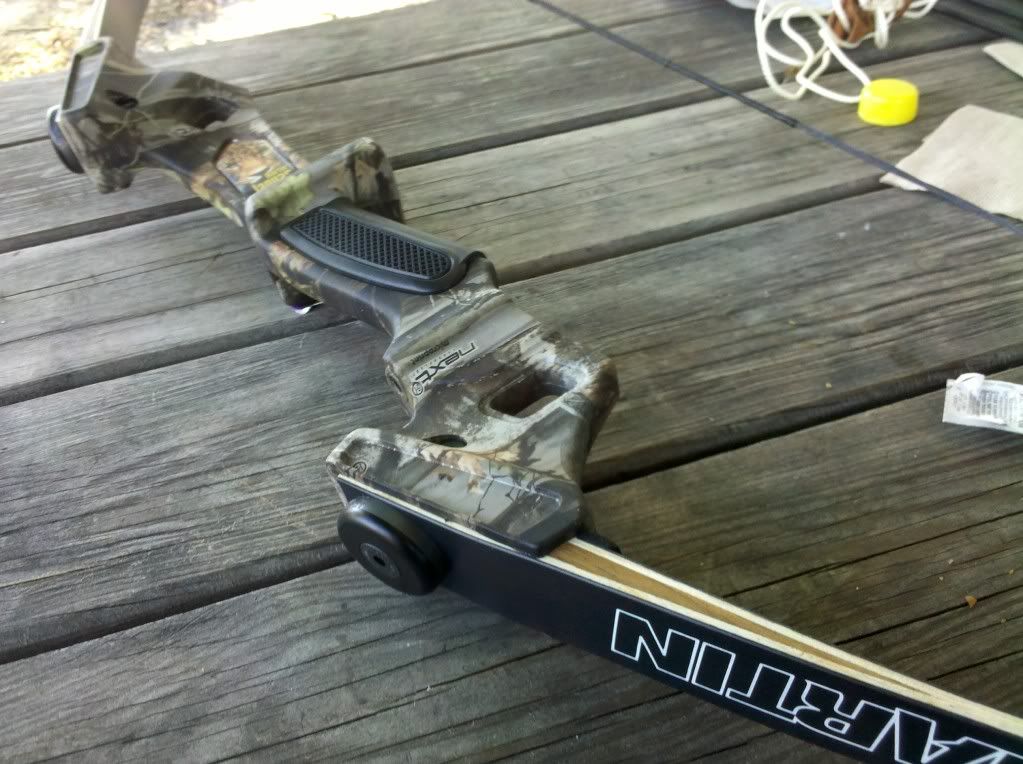
I went with a Martin Jaguar three piece recurve. I didn't have any particular brand in mind but I wanted the three piece recurve because it can be broken down and put into a backpack. A compound bow or a crossbow would definitely be superior in accuracy and power, but this recurve is lighter and breaks down more easily. I also really wanted to build my skills without sights. After all, any improvised bow that I make will be without them. 
 
 
Overall it is a great bow, very reliable and simple to use. The only downside is the arrow rest it came with, a friend got me a much better one as a gift and it has made a huge difference in accuracy. With a 50 pound draw it can be a challenge for someone smaller but you can untwist the string a bit to lower the draw weight. ( thereby lowering the power as well ) It also has the ability to attach sights and a quiver should I choose to at some point. The entire bow breaks down to about 24" with an allen key, and fits easily in my pack.

Tuesday, May 1, 2012

Build a Smokehouse

    Smoking meat has been practiced for thousands of years as a way to preserve meat unrefrigerated for an extended period of time. It's also quite tasty. Now sure I could've just gone out and bought a smoker, but I like to improvise. My idea was to build a cold smoker, so that I could smoke cheese as well as meat. For this project you will need a wooden box of a fair size, a pipe at least six inches in diameter, a shovel, and a pot lid at least sixteen inches across. I'm using the lid off of my charcoal grill. The idea is to build a Dakota stove with a chimney leading into the wooden box. A Dakota stove is simply two holes with a tunnel dug between them. Build a fire in one and it will pull air through the tunnel. This is traditionally done so that a campfire cannot be seen from any distance away. Very important if you're trying to stay hidden in big sky country. The reason I'm using this method is that a smoke house is usually built into a hill, I do not have a hill.


     Start by cutting a hole in the bottom and top of the box, being sure that the one in the bottom is larger that the top. Save the cutout from the bottom and use it to cover the upper hole. Select the location for the smoker. Dig a hole a distance away matching the length of the pipe you have, dig a second smaller hole about a foot away from the main fire hole. Dig a tunnel towards the bottom of the hole about six inches in diameter between the two for the air inlet. Now dig a trench between the smoke house and the fire hole deep enough to bury the pipe. Bury the pipe under at least a few inches of dirt. (Place a branch on top to keep it from getting stepped on and crushed) The soil acts as a heat sink, cooling the smoke as it moves through the pipe. A cold smoke allows you to cure without cooking, important for sausages and cheese. If you do have a hill, dig out a fireplace and run the pipe just like a chimney up to the smokehouse. 


     When its all done start a roaring fire in the main hole with the lid off. Charcoal works best, but any dry hardwood works. Avoid soft woods like pine and cedar, they can deposit soot and some pretty nasty stuff, they will definitely ruin the meat. While you're waiting on the fire, soak hardwood chips in water, at least a half hour. Soaked chips produce more smoke and keep the fire from getting too hot. Any hardwood chips will work but some are better than others for flavor. I prefer hickory and apple, maple and oak give nice flavor as well. Chips can be purchased in the grilling section at the store or you can chop them yourself, if you have a wood chipper even better. For my last smoke I did a combo of store bought hickory and maple I chopped myself. By now the coals should be ready, hold your hand over the fire pit, if you can't count to five without pulling your hand away it's hot enough. Pile a big handful of wet chips in the middle of the coals and cover the fire hole. The chimney being on top and the air inlet on the bottom should make it draft easily, if you get smoke out of both holes try blowing in the air inlet. Adjust the opening on top of the box using the cover you cut out of the bottom. The idea is to keep as much smoke in, while still allowing the draft to work.
 
     For the inside of my smoker I use cooling racks that are normally used for baking, I also hang meat inside. For this BBQ im smoking slab bacon, one whole chicken and about ten drums. I smoked this batch for about four hours, adding chips and rotating the meat every hour. After the smoke, grill and add your favorite sauce.

Wednesday, April 25, 2012

Know your Plastics


Plastic is one of the most common items in the world. We make everything out of it, but not all plastics are created equal. Some are good, most are bad. If you turn over any plastic item it should have a recycling symbol with a number in it. Occasionally this number will not be there, unless it says PP in the symbol in place of a number it should be discarded. The number system identifies the type of plastic, PP denotes polypropylene, which is food safe. If there is no identification, assume the worst and throw it away. Plastic products are full of chemicals, many can leech into food and water, some simply deposit chemicals like BPA (Bis phenol-A) on everything they touch. Most of these chemicals are long term dangers, in a survival situation, use whatever you have to. In the case of prepping food and water for said survival situation, keep these things in mind. It is a good habit to be in, just in case the apocalypse never comes, it would be nice to live to a healthy old age. 


#1 PET (Polyethylene Terephthalate) Not food grade, avoid if possible.
Commonly used in soda bottles, water bottles, cooking oil containers. Should be avoided for anything other than water. They can leach antimony and phthalates. Not really any short term danger but not good for food storage, especially acidic contents.


#2 HDPE (High Density Polyethylene) Food grade, safe to use.
Commonly used in milk jugs, plastic bags, and garbage cans. This is the most common plastic you will find. It's widely used in the food service industry. Generally the big blue plastic barrels everyone uses for emergency water are made of this material as well.


#3 PVC (Polyvinyl Chloride, aka Vinyl): Not food grade, avoid if possible.
Commonly used in condiment bottles, shower curtains, Saran wrap, and toys.
Can leach lead and phthalates and other nasty chemicals. Can also release toxic gases when heated or exposed to chemicals.


#4 LDPE (Low Density Polyethylene): Food grade, safe to use.
Commonly used in grocery bags, food containers.


#5 PP (Polypropylene) Food grade, safe to use.
Commonly used in Gladware, water bottles and bottle caps.


#6 PS (Polystyrene, aka Styrofoam): Not safe, do not use.
Commonly used goddamn everywhere.
Can leach carcinogenic styrene and estrogenic alkylphenols. It's also about the worst thing for the environment on this list.


#7 Can be a variety of plastics, some are safe, most are not. If it doesn't specify, avoid.
PC (Polycarbonate) Avoid at all costs, it can leach Bis phenol-A (BPA). Also commonly used in thermal receipt tape so avoid that as well.
ABS (Acrylonitrile Butadiene Styrene), S. AN (Styrene Acrylonitrile), Acrylic, and Polyamide fall into this category too. They are safer, but not great. Some require a bit more research as well before I would trust them.

New plant-based, biodegradable plastics like PLA (Polylactic Acid) also fall into the #7 category and are food grade.

Sunday, April 15, 2012

Wild Onion Soup

Now that you've made your own stock, time to make soup! I did a post about this time last year titled "Food is everywhere" To revisit this concept we will be making wild onion soup. Wild onions are easily spotted about this time of year. Commonly called onion grass, they look quite like a small patch of tall grass. Once you notice them, you can't help but see them everywhere. Dig up the taller clumps and pull out the bigger bulbs. They really do grow like weeds so unless you have a lot of time on your hands don't bother with the smaller ones. In a survival situation they can be eaten right out of the ground, though caloric content is pretty low. The flavor is like a cross between a chive and a green onion. Gather a whole bunch and clean them thoroughly. Chop off the roots and remove the bulb just below where it begins to turn green.

Ingredients-

-2 cups wild onion bulbs, cleaned and sliced in half lengthwise
-6 cloves garlic, chopped
-1/3 of a stick of butter
-1 tablespoon rendered chicken fat (optional but recommended)
-6 cups chicken broth (or beef)
-1 cup white wine (red if using beef)
-4 ounces beer (pale ale for chicken, stout for beef)
-1 tablespoon flour, (Any type will do)
-Salt and pepper to taste
-2 tablespoons Herbs De Provance or preferred French herb blend
-Sliced Baguette
-Provolone cheese, sliced

Melt butter and chicken fat in a large pot, add onions. Wild onion takes awhile to soften, saute for about 15-20 minutes until they begin to brown. This is where the chicken fat makes a difference, butter may not brown them much. When the onions are almost done add the garlic. Sprinkle flour on top and cook for an additional two or three minutes to cook off the raw flour taste. Add the wine and beer and bring to boil. Simmer until all the liquid is gone then pour in broth. If using home made stock I like to pre-mix it but you can do it in the pot, start with 3 cups water and add stock till it tastes right. Add herbs, salt and pepper, simmer uncovered for an hour. Taste and add spice as needed.

Toast the sliced baguette till it's quite crispy. Fill an oven safe bowl with soup and float the bread on top, cover with cheese and broil until the cheese browns.