Saturday, June 4, 2011

Viking Champagne

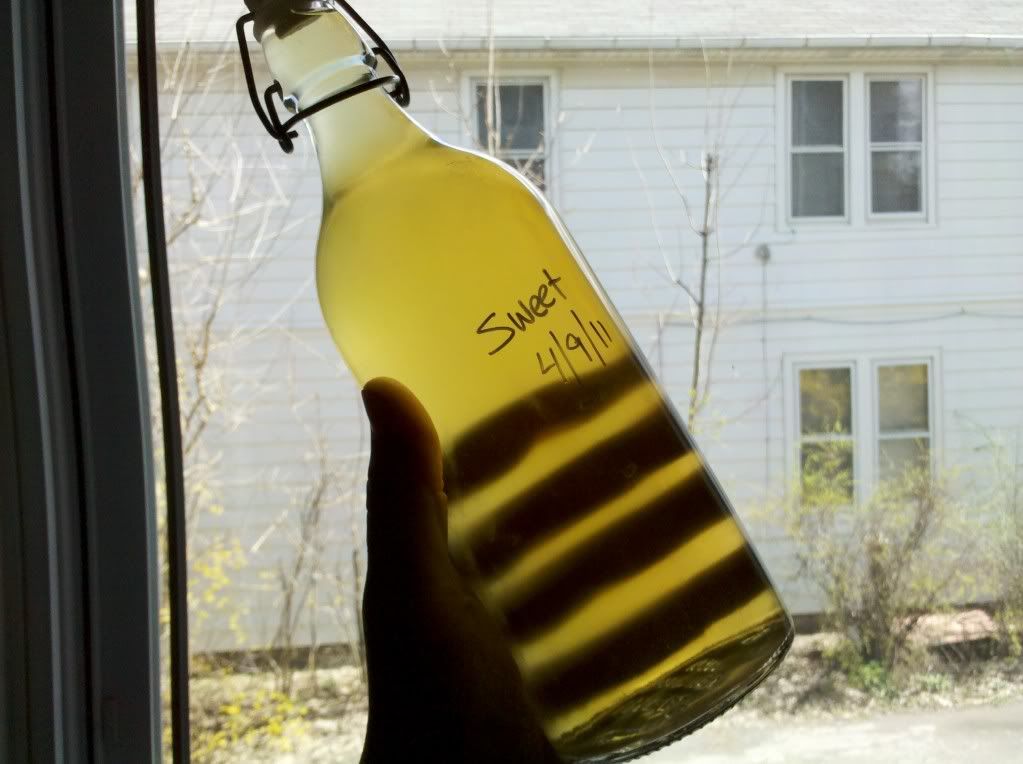
My recipe for hopped, carbonated Mead. Not a very common concoction as far as I can tell. (For those who don't know, Mead is a honey wine) Now I'm not a wine guy by any means, just beer and bourbon for me. As you can tell, I want to be self sustaining after I can't run to the store and grab a sixer of Long Trail IPA. So I thought to myself, all alcohol is made of sugar, what are my natural options in the state of New York? Apples, grapes, maple syrup, and honey.

My first foray with homemade alcohol was with apple cider. This went pretty well, but unfortunately New York has passed laws that force orchards to add potassium sorbate to their cider. So it takes forever to ferment, and gets a very acidic flavor. So until I get a good cider with no preservatives, I wont be posting a recipe. The second was with grapes growing in my backyard. I would say good, not great. Still working on it. As far as maple syrup, I'll follow up on that one in the spring.

So, on to honey. My first mead was awesome. The trouble is, being a proof of concept, I didn't write anything down. I mentioned before that I'm not a wine guy, so I decided to go with an ale yeast the first time. Because it was an ale yeast and not a vinter's yeast, it had more of a flat, sweet, beer flavor (compared to a wine taste). By the way, yeast is an ingredient people really don't give enough credit. It can completely change the flavor of what you're making, so keep this in mind when you get your yeast for whatever you brew. For this brew I used Nottingham ale yeast, but any ale yeast will go pretty well.

After my first batch, I started to wonder: what about a hopped, carbonated version? With my particular palate, I'm an American IPA fan. Low malt, heavy hops. The honey in mead is perfect for this, since you don't have to rely on malted barley for sugar content in your wort. (Wort is unfermented beer.) So I did a 2 gallon batch of hopped mead as an experiment, which was awesome. And because it was so awesome, I'm going to share my recipe with you.

This recipe is fairly approachable for any beer drinker. With a hop character close to a pilsner, (about 20 IBU) and some flavors akin to a mulled wine. It should be noted that you will get a bit of a musky after taste that many may not be used to. This is the lack of malt to balance the hops. My next batch will be tripling the bittering hops, and using amarillo hops instead. These have a higher acid content and bitter the Mead further. This should put it at about 70 IBU (International Bittering Unit)

Ingredients

-12-16 lbs of honey (more honey = sweeter/higher alcohol mead, depending on yeast used. Use a hygrometer* to measure sugar content and compare to what your yeast is capable of)
-4 gallons water
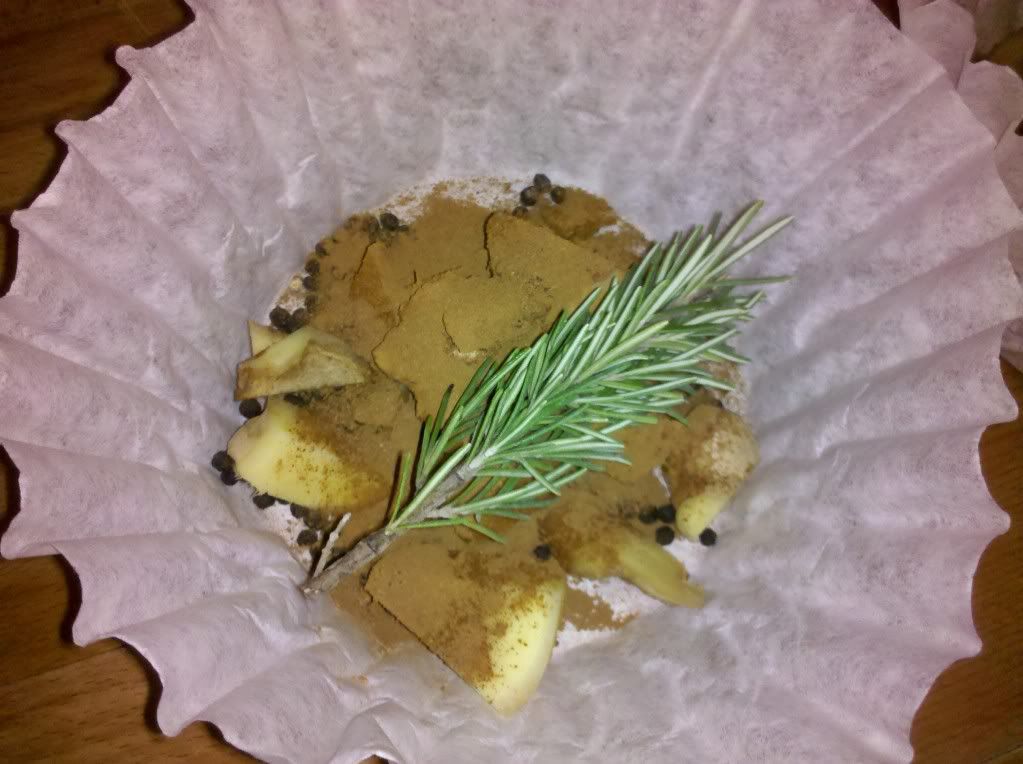
-5-7 0zs fresh ginger (peeled and roughly chopped)
-2 sprigs rosemary
-5 tbs cinnamon, or 6 whole sticks
-1 lemon
-8 oz raisins
-1 oz perle hops (pellet)**
-1 oz cascade hops (pellet)**
-1 packet Nottingham yeast
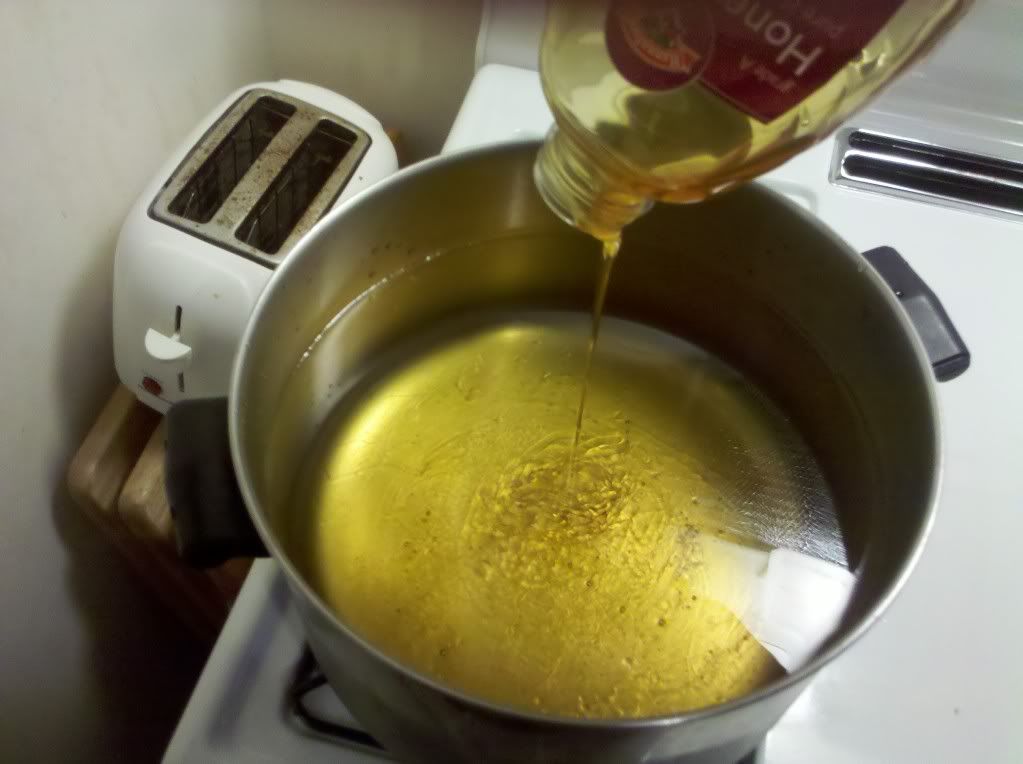
Bring water to a rolling boil and add honey, bring back up to boil. Add ginger, cinnamon, rosemary and perle hops. Boil for 60 minutes to obtain highest bittering from hops. In the last few minutes of boil, zest lemon and throw in the rest of it. Add raisins as well, this is mostly to sterilize. Allow to cool and pour into fermenter, lemon, cinnamon, raisins and all.  (glass fermenters are always best) While your brew is cooling, make a yeast starter.

Microwave some water to sterilize, just bring it up till it barely boils, and add a little corn sugar if you have it or some  honey will work. Pour your packet of yeast into it after it cools to about 75-80 degrees. This helps the yeast to procreate quickly before adding it to the wort. When the wort has cooled to below 90 degrees, add your starter, along with the cascade hops. Let it sit for a few weeks until you stop seeing bubbles for your airlock.***

When your mead is done fermenting, it's ready to drink, but if you really want Viking Champagne, you need to carbonate. Bottle conditioning is the most low tech way to do it, but if you have a keg and CO2 tank, that the easiest.

For bottle conditioning in a 5 gallon batch, mix in 8.5 oz corn sugar, and bottle. Grolsh beer bottles with silicone seals work really well. I also got some really good pop-top bottles at Ikea. Store at 70 degrees for about a week and they should be done. For carbonation in kegs, add about 30 psi and refrigerate.


*Hygrometer measures sugar content of wort, can be purchased on Amazon for like 5 bucks.
**Will be swapping out for 3 oz Amarillo bittering and 1 oz Fuggle in the next batch for a 60-90 IBU brew.
***Airlocks allow C02 to escape without allowing oxygen in, can also be purchased on Amazon very cheaply.


Monday, May 23, 2011

Concealed Carry

Concealed carry is a very touchy subject for many, and in a few states its flat out illegal. I'm really not looking to get into my opinions or spout statistics to anyone. Suffice to say, I carry a gun and I do so legally. Bad things happen to good people everyday, whether its violence or a natural disaster, you need to be prepared. If you decide you need to carry a gun, please follow the rules. A good reference I've found is carryconcealed.net. They have a ton of information and links for you to find all the info you need.

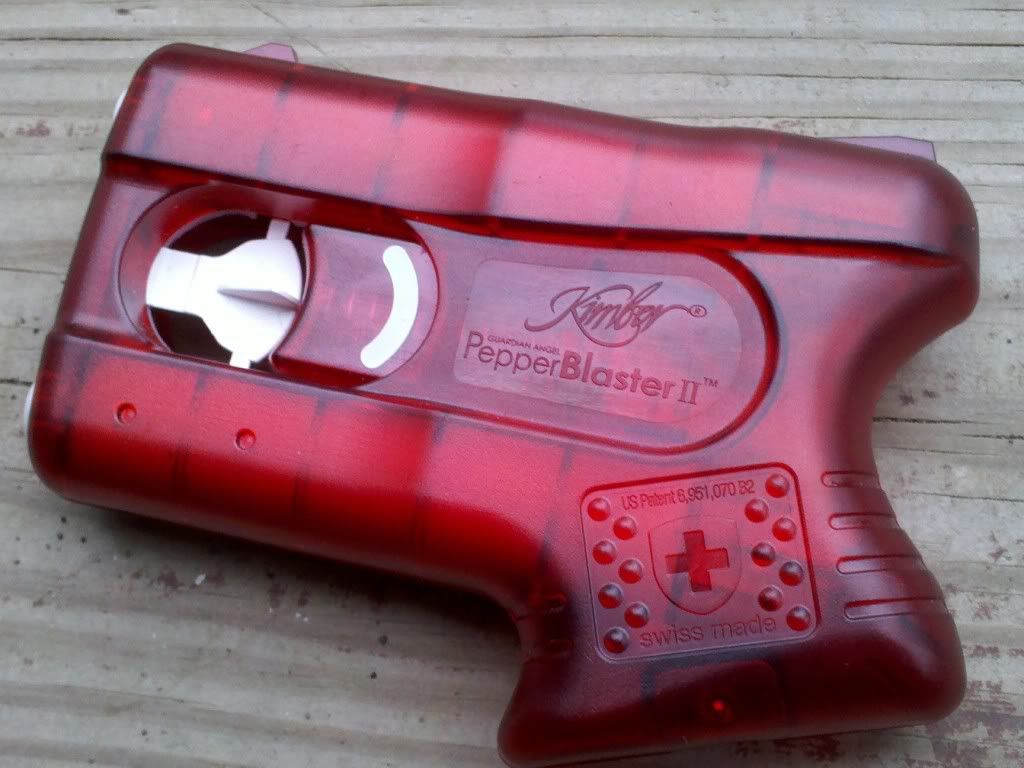
If you decide that carrying a gun is not right for you, or you live in area that it's not legal, (or so painstaking to get a license it's not worth it) there are other options. Some states allow concealed carry of tasers and less lethal options. My personal favorite is the Kimber pepper blaster. They retail around 40$ and can be purchased at most places that would sell firearms or pepper spray. Unlike typical pepper spray, these are effective out to about 12 feet. The active ingredient (capsaicin) is in a gel, instead of an aerosol, this limits blowback onto the user. Newer models have sights like a gun and are really easy to use. Check local laws regarding the carry of such items. The retailer you buy it from would be the best place for information in your area.

Before puchasing a handgun you need to decide what you're going to want to carry. I try to balance stopping power, price, and concealment. There are thousands of choices out there, it all depends on what your situation is. A good route to take is to have a couple options. Maybe have a larger pistol with a lot of power that you can carry when its convenient enough to conceal. For instance when you're wearing a heavy coat or sweatshirt. Then to also have something smaller and lighter for the summer months when you're wearing shorts and a t-shirt.


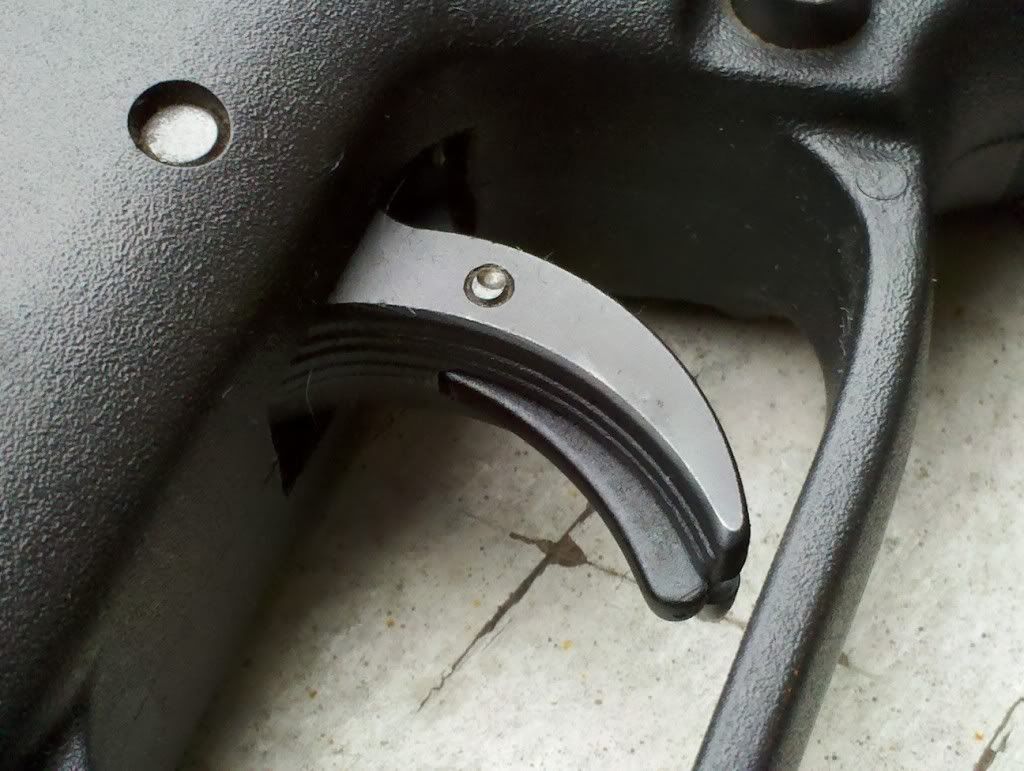
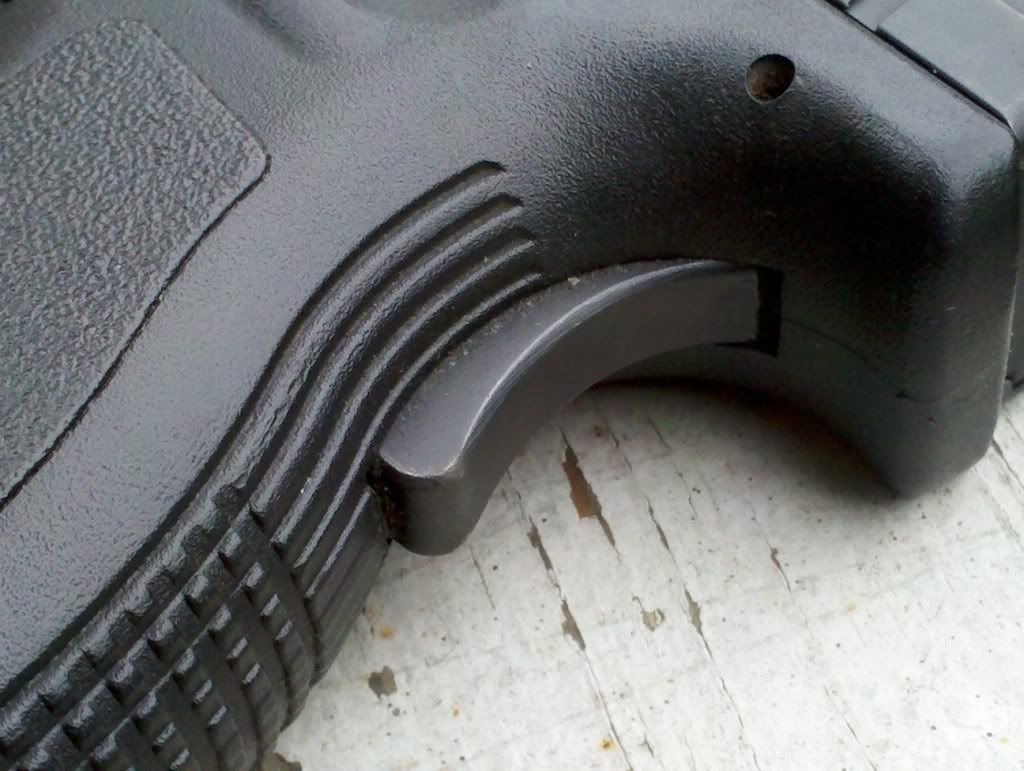
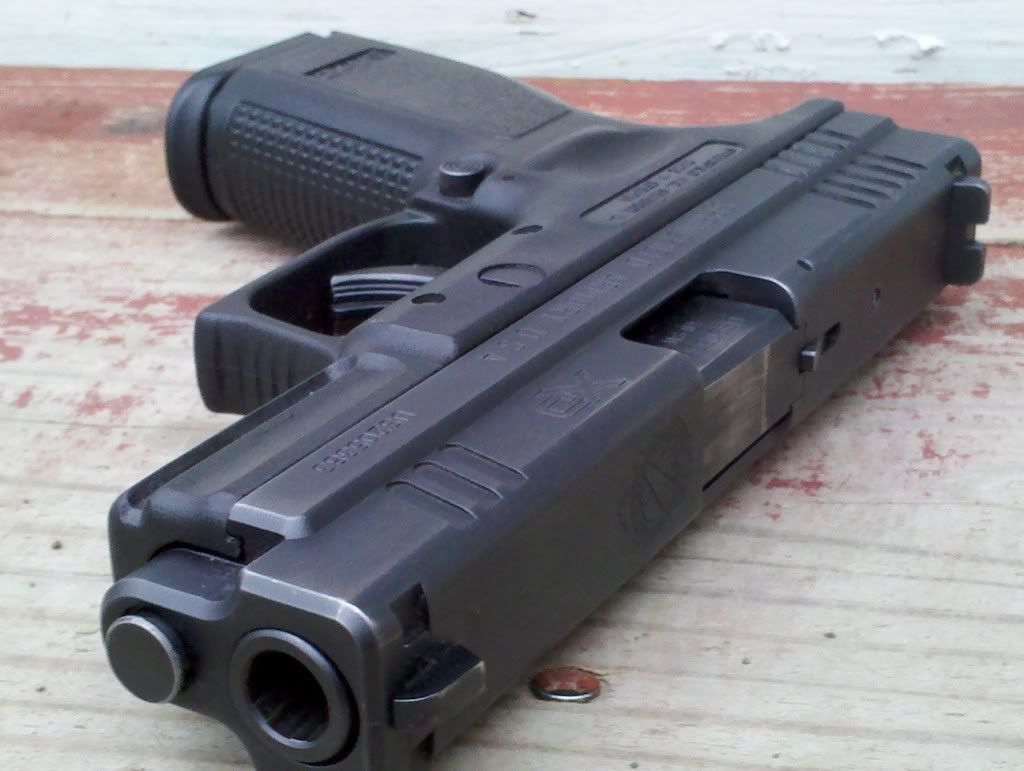
For my main carry pistol I went with a Springfield Armory XD in .40 caliber. This is a very rugged, polymer framed pistol. I chose it because of it's reliability, safety, and reputation. I've fired over 2000 rounds through it and only had a few malfunctions. (all ammo related) The main draw for me was the safety system, it's equipped with two safeties. The grip safety is on the rear of the gun. It makes it so the gun can't fire unless it is being gripped, if it was dropped for instance. The second safety is on the trigger. The trigger canot be pulled without a deliberate action. this protects from snagging the trigger and accidentally discharging it. Many other guns in the same class, Glock would be the most prominent, only have the trigger safety, or none at all. Some Glocks do have manual safeties. I garuantee the first time you go to fire it at the range and realize you left the safety on, you'll wish you had something more intuitive though. They're also equipped with loaded chamber and cocked indicators. If you live in a state that has no magazine restricions I recommened checking out the XDm as well, everything the XD has with higher magazine capacity.


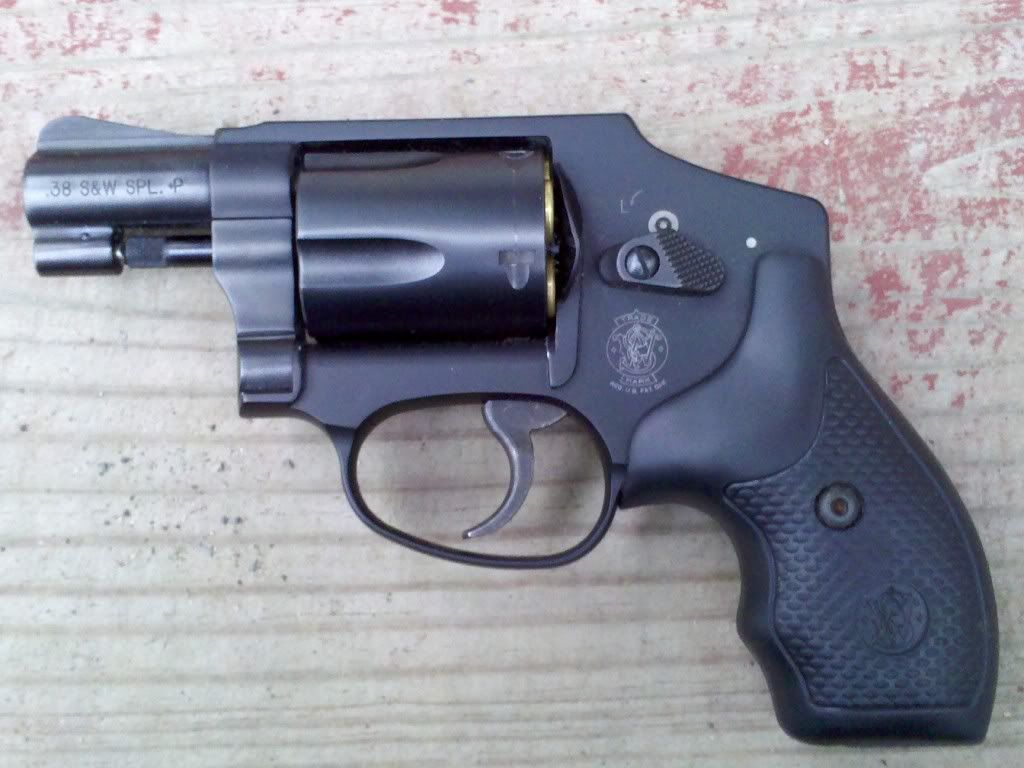
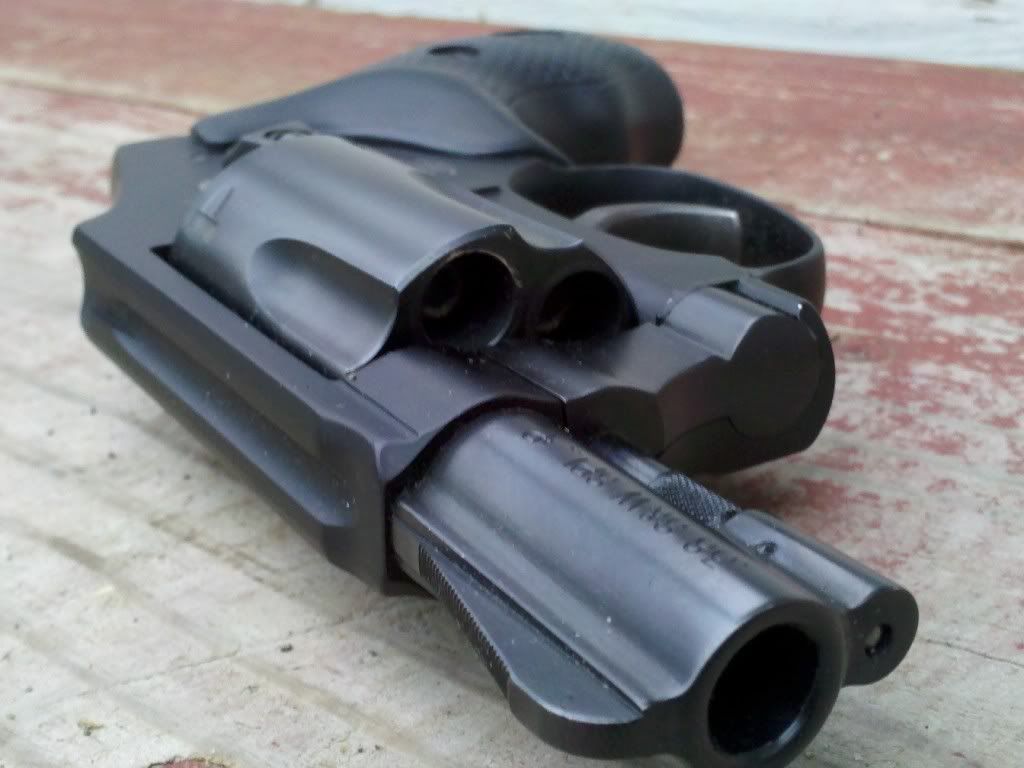
For my secondary, I carry a Smith and Wesson M442 airweight, in .38 special +P. Not quite as powerful as the .40 caliber, but being able to carry it in my pocket or on my ankle is really nice. The reason I was drawn to this model is the reduced weight, and hammerless design. You can definetly get a gun from Taurus or a half dozen other manufacturers that would be comparable in quality. They would most likely be much cheaper as well, but they'll never be as light. Before this one I had an older model 36, a nearly identical gun on the surface, but a whole lot heavier. My new one loaded is lighter than the old one unloaded. But if you're looking to save some cash and can deal with the additional weight I would check out Taurus. The hammerless design is offered by most revolver manufacturers. The lack of hammer makes it much less likely to snag on clothing while being drawn. You do lose a little accuracy by not being able to fire it single action. I think its a sacrifice worth making, especially if you're going to be carrying it in your pocket. It's also equipped with an integral locking sytem. When locked, the trigger cannot be pulled.

Possibly the most important part of carrying concealed is choosing a holster. Last thing you wanna do is shoot youself in the leg because you were too cheap to buy a holster. I have quite a few for all my guns. Not because I planned it that way, but because I was cheap. Do not buy universal holsters. They are not very good, ever. Spend the money and buy a Kydex or leather holster made for your gun. I'm not a big fan of Kydex (plastic) holsters, simply a matter of comfort for me. I think in open carry they are well suited, but not my cup of tea I guess. My brand of choice is Desantis. I have two leather ones for the XD, one in the waistband and one on the belt. Both are very comfortable, but the in waistband one does show a little when you bend over or sit down. The belt holster is great for open carry or concealed, provided my shirt is loose fitting enough. For the .38 I use an ankle holster, (also from Desantis) or carry it in my pocket.

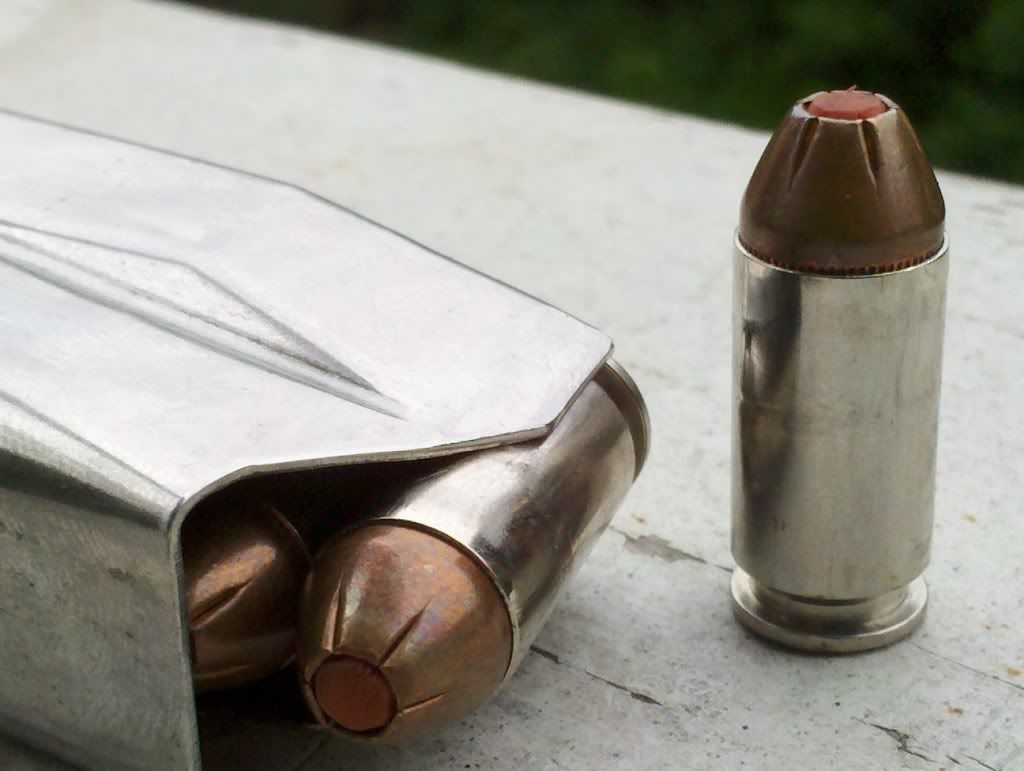
Ammunition is very important too. Everyone has their own preference on brand, caliber and the like. The whole point is that if you're pulling a gun, it should be in the defense of your life or someone elses. You do not draw your weapon unless deadly force is your only option. I am fortunate that in the couple years I've been carrying I have never had to draw my gun. I hope I never do. But if I did, the last thing I should be firing is target rounds. Most cheap target rounds are full metal jacket. These don't stop when they hit someone, they keep going long after they exit the bad guy. Last thing you want to do is hit an innocent bystander. Do yourself a favor and carry high quality personal defense rounds. Theres way to many out there for me to review them all but I'm pretty brand loyal to Hornady. Generally I carry their TAP Critical Defense. They're frangible hollowpoints with a polymer tip. Because of the hollowpoint design they stop within a few inches of impact, limiting the chance of it going through. This also expends all of the bullets energy, causing more damage.

Nothing I can tell you here can make you more safe than proper training and practice. If you don't feel comfortable, take a class. Read up on proper technique, and get out to the range as often as you can. You could have the nicest and most powerful gun on the market, but if you havent developed any skill with it, you're screwed. Muscle memory is very crucial when it comes to drawing and firing your weapon in a stressful situation. Practice until every move becomes second nature and you will give yourself the best chance in the worst possible situation.

Monday, May 16, 2011

Maple Identification

This past spring I was way to busy with quite a few projects and wasn't on the ball with a post about maple syrup. So unfortunately we're well past maple syrup production this year. The good news is everything is green again. This makes identifying trees much easier. This is the time of year to identify sugar maples and mark them for harvest next spring.

For those that don't know, maple syrup is simply the sap of a sugar maple (black maples and a couple other varieties work as well) boiled down about 40/1. Next year around February I'll put up a post with more detailed directions on the process. Then in early march some video of the process itself.

For now it's important to find our sugar or black maples while they're easier to identify. To the untrained eye, most maples look the same, but only about half the varieties will yield a sugary enough sap to make syrup, and some can't be used at all. I live in New York, about 90 miles North of the city in Poughkeepsie. My area is fairly suburban although it is a city. Many of my streets are lined with maple trees. Too bad they're mostly Norway maples. These are a species imported in because they do well in an urban environment. They have a milky sap that is not good for syrup. The easiest way to identify them is by pulling a leaf off and squeezing the stem, you will see a milky substance. They have broader leaves (pictured left) than sugar maples and a smoother bark. (It is very difficult to tell the difference in the bark of young trees, black and sugar maple bark becomes scaly with age)

What I'm most likely to find in my area that I can use are black maples. Sugar maples are fairly common in New York, but are more prevalent north and east of me. The black maple has smaller leaves than its Norwegian cousin, and it's sap is clear. It should be noted that any maple with a clear sap can be tapped for syrup, but you may not yield as much for the work. I have heard that silver maples work fairly well, but have no experience with them. Look for scaly bark, (pictured right) and pull off a leaf. If the sap runs clear it's a good bet its what you're looking for. Selct trees at least 10 inches in diameter, with no evidence of dead limbs or rot. Make sure however you mark your tree, it's gonna last till spring. I used a wood screw and a bit of yellow plastic.

Monday, May 9, 2011

Water Purification and Procurement

This seems like it should be a no brainer to me, but I am constantly surprised at how little people think about something as important as water. Hopefully you have your disaster plan ready, with plenty of water stored up. Even if you do you need to plan to find it for yourself.


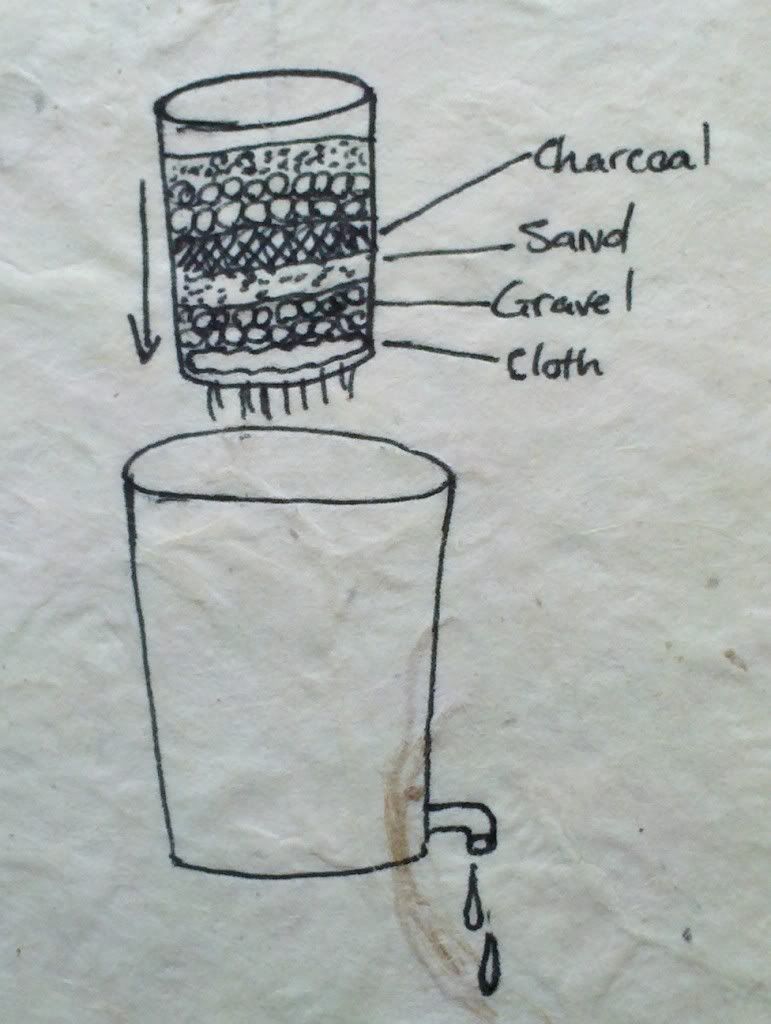
All questionable water needs to be filtered and sanitized, if you have any reason to think theres chemicals in the water, leave it be. No amount of improvised filtration is 100% effective. For heavy stuff like dirt you can make a filter out of cloth, or let it settle and skim off the top. For the stuff you cant see, like giardia and other pathogens, you need something a little more fine to filter through. Take a couple five gallon buckets, the stackable ones are best. Drill one hole near the bottom of one, and 20 or so in the bottom of the other. Take the bucket with the holes in the bottom and place a cloth at the bottom. Make layers of alternating gravel, sand and charcoal. Starting with the gravel on the bottom. place this bucket inside of the one that has the small hole drilled. this should give a couple inch gap at the bottom for the water to drip. Something similar to this can be improvised from almost any container.


Now to purify. Boiling is always best. It desroys all pathogens, and evaporates many chemicals. Bringing water to a rolling boil will nearly always make it safe to drink. Boiling can also be used to make salt water drinkable. By building a simple still you can catch the condensed water that boils off, while leaving the salt behind. This method is also effective if filtration isn't possible, as any dirt or debris would be left in the boil pot as well. The simplest of stills would be a plate or a piece of metal suspended over a pot of boiling water. Tip the plate down towards another container and the steam will condense and drip down. A simpler way of doing this is to throw your t-shirt over a pot of boiling water, let it absorb the steam and wring it out.

Pasteurization is a fairly reliable method as well, but I would only recommend it if you dont have anything to boil in. To pasteurize, heat the water to 160 degrees and maintain that temp for about a half hour. This should kill anything in there. You can do this in a plastic container by placing it near your fire and slowly bringing up the temperature.

You can also purify water with bleach, I wouldnt recommend doing this unless you had no other choice. Really it isn't much different than how your tap water is purified in many places. Take your water 1 gallon at a time and add 1 tablespoon of bleach at a time, mix and let sit for about 20 minutes. If the mixture begins to smell very slightly like bleach, you're done. Let it sit an additional hour, and drink. By this point the chlorine has killed off all the bacteria, and hopefully some of it has evaporated enough so that it tastes ok.


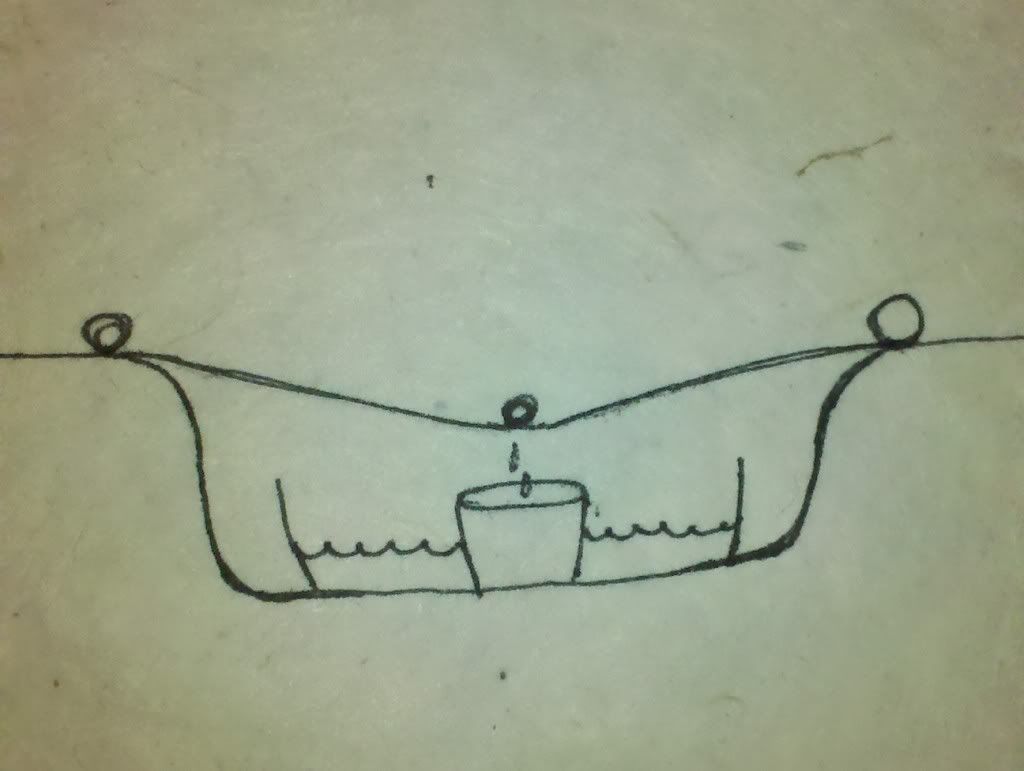
Solar stills are about the most effective, they require no energy to run, and once you're done building it, it doesn't require much work. Dig a hole a couple feet deep, and a few feet wide. (size depends on the containers you're using) Place a large, shallow container (or line the bottom with a black garbage bag) and fill it with your tainted water. Place a smaller container in the middle. (make sure it doesnt float) Cover the hole with a clear plastic bag. Line the edges with rocks to make it somewhat airtight, and place a small pebble in the center of the plastic above your cup. The sun heats the still like a greenhouse, the water evaporates and condenses on the cooler clear plastic. It then runs down the the low spot where you placed the pebble and drips into the cup. If you have a long piece of tubing you can place it in the cup and run it outside the still so you can drink without disturbing the plastic. This method is also effective for purifying urine if there is no water available.

Procurement can be a challenge in nature but there are tons of opportunities in an urban area. The easiest being your hot water heater. I touched on it in my last post. Simply shut off the water coming in, (there is most likely a valve at the top) and drain from the bottom. Simple as that, you dont even need to turn off the valve at the top onless you're worried about contaminated water in the taps. (for example in a widespread flood scenario or nuclear disaster)Another easy one is the toilet, by that I mean the tank at the top, not in the bowl. In a dire emergency you could use the water in the bowl, but it would need to be sanitized first.


Simple rain collection can be your best bet for long term survival. If you own a house, use your gutters, clean them well and the water should be good to drink as is. If you have a tarp available, use your imagination and build a collector.

Friday, April 1, 2011

Radiation protection

I've touched on this a few times in previous posts, but considering what's going on in Japan it seemed like something I should get into in depth. Now despite the fact that nobody believes it, you really shouldnt be worried about radiation from Japan. Radiation is very dangerous, but we're exposed to it every day. If I flew out to California today I would be exposed to more radiation at 30,000 feet than I ever would at a California beach. That being said, its at least good that people are thinking about this kinda thing now. I live north of Indian point nuclear facility, which has just been deemed as the most at risk plant in the US in an earthquake scenario. Weird right? Who would've thought that in New York.

The first thing you need to do is asses is your risk. If you live over 100 miles from a nuclear facility, you're not in much danger, but take prevailing winds into consideration. Radiation can travel hundred of miles under the right conditions. If you're not downwind and far enough away, your only radiation risk is from nuclear weapons.

In this day and age its not likely that we will face the detonation of a nuclear device on American soil, but we should consider the possibility. There is also the risk of a dirty bomb. I think these are a more likely scenario than tactical nukes, barring proliferation in countries like North Korea and Iran. If you live in an urban center, you should be prepared for a terrorist attack. A dirty bomb is not a nuclear explosion, but rather an improvised explosive packed with radioactive material. The purpose of which is to cause damage to the population through radiation sickness. This would damage a population far beyond what a normal explosive could accomplish. In many countries such as Iran, it probably wouldn't be very difficult to obtain these materials. In this scenario, a gas mask and iodine tablets are a necessity. You can purchase military surplus gas masks from cheaperthandirt.com for about ten bucks. Iosat radiation tablets can be bought from Amazon.com from many distributors. You may have some trouble finding them nowadays, I've heard most places are sold out.

The gas mask is not as much of a necessity in the meltdown scenario, as there is no explosion (nuclear or otherwise) to kick up radioactive dust and debris. But fires caused by a meltdown can cause clouds of irradiated ash and smoke. There is also the possibility of an attack on a nuclear facility. In case of a terrorist attack, you should hopefully have a plan already.

A few key things to know, radiation, gamma radiation specifically, radiates out in all directions from whatever particle its attached to, it does not turn corners. So the best place to shelter is in the basement of a building with at least two floors. The idea is to get as much material and space as possible between you and radioactive particles. If in a city, a central room at least two floors up and with two floors above should shield you from most radiation. If possible pile as much stuff between you and the outside as possible. For example, filing cabinets, mattresses, blankets, whatever you can find. Make sure to mark your shelter for search and rescue with the number of people inside. Do your best to make your shelter airtight, particles of dust and debris can carry radiation into your shelter. This is most important in the first couple of days. Most radiation will have dissapated to a safer level after three days, but in the case of a meltdown this isn't true. A power plant has so much material it will spew radiation for weeks. It is best to wait for rescue until you can't wait any longer.

If you have to leave, have a plan. Take into consideration wind and terrain. If the plant is in the west and the wind is blowing east, travel north or south out of the swath of radiation. You wont be able to outrun it going east. If you have no water you're going to need to get moving sooner. You can go three days without water, and three weeks without food. If you don't have water, don't eat, digestion uses up water. If you're out of water and there's little hope of rescue, get moving by the second day, if you wait too long you'll be too weak to move. So stock up on water, have at least a couple bottles in your car, in your desk at work, and have at least 10 gallons per person at home. Don't forget, your hot water heater has about 30 gallons or more in it. So at the start of the disaster, shut off the valve that supplies water in, and drain out the bottom. Make sure you have a battery or hand crank radio at home or in your car as well. Hope this helps out, and hopefully you wont need it.

Tuesday, January 18, 2011

Cold Weather Survival

PhotobucketThis post is mostly due to our last attempt at cold weather camping. It was fun, but theres a few things I would probably do different next time. The first time I went a few years ago was a complete disaster so I would consider this one a great success in comparison. The first one I think I would say we were a bit ambitious, and completely unprepared. We went out in 5 degree weather with nothing but a couple of Walmart sleeping bags, cheap bivy tents and a 12 pack of beer. What we learned is do not assume fire will be enough. That night ended in huddling around the fire and not sleeping a bit. It was decided that this time would be a best case scenario end of the world.
Photobucket
Pictured above is our campsite, obviously its a lot more than you could ever carry on your back. Also, I must admit we were lazy and brought all our wood. I figured the last time was such a nightmare, I wasn't taking any chances. So what we wanted to try was lean-to construction, nothing Bear Grylles would write home about, but I think we did fine. Next time I will definitely build them smaller. Mine was ok being that I had no air space at the back, but my friend Ryan had a hell of a draft all night. Im thinking a space blanket hung at the back would've helped.

Wednesday, October 13, 2010

Daily preparedness, part 3

This post is all about my bugout bag. I sorta have two, the first one being my tactical vest described in an earlier post. This one is the one I will more likely end up using. Ideally I would be at home when the shit hits the fan, as this is where my rifle and most of my gear is stored. The reality is that I'm out of the house a minimum of 50 hours a week, and that's if I only go to work. So I've decided to put together a more comprehensive bag for the Jeep. This is alot more involved than the survival tin, as its made with the idea of keeping you alive for about three days.

Start off by thinking,what's the bare minimum I would need for a weekend trip? Now going from there scale down the clothing and add food and water and you're pretty close. Make sure you consider things like medications, contact lenses, glasses etc. I wont get into all that sorta thing as everyone has different needs in those areas.

The basics aside from meds and toiletries I keep in my truck are as follows.
-Three days food and water, taking into acoount my girlfriend and the dog
-Basic first aid kit, be sure to include splints and trauma gear, I will get into first aid a little later, maybe my next post
-2 gas masks and spare filters (cheaperthandirt.com)
-7 day course Iosat radiation tablets for two
-50' paracord
-Cleaning kits for any firearms I may be carrying
-KA-BAR, I went with a tanto tip in black
-Multitool, I use a Colorado river Zillatool
-3a rated concealable body armor, not really a necessity but nice to have if things get really bad, check local laws on that one as well.
-MSR camp stove and three cans of fuel, Jetboil is a good brand too
-Minimum 2 flashlights, I use a maglight aa led, and a Streamlight Stinger led rechargeable (the Streamlight is cool because you can charge it through the cigarette lighter)
-Flint, matches, lighters
-Canteen and Steel canteen cup for boiling
-Iodine tablets for water purification
-Either a small tent or tarp for shelter in case you need to abandon the vehicle
-Collapsible shovel or entrenching tool, just a good idea to have in the car anyway
-1 pair of boots, decent hiking boots are a good idea
-Gas can, I just have a 2 gallon one for space but bigger is probably better
-I also recently added a small sterno stove and 6 cans of fuel in addition to my msr, this will mostly be for melting snow.


These are pretty much the basics, obviously your region and potential threats can change this kit drastically. Being that I live just north of the Indian point nuclear power plant I feel the iosat and gas masks are an absolute necessity, if you live in Canada lets say, warm clothing would be much more important.